参考资料
前言 介绍一些对 Fluid 主题的一些美化
记录一些对功能的拓展,以及对于行内代码和加粗的一丢丢小修改
有些博主会改动文章的宽度等,个人就不动了
另外小改怡情,大改伤身🙃
工具价值
工具应该注重于使用的价值,而不是人为工具服务
这也是后来有些工具推出只为写作服务,而非为样式服务的工具
速度问题
因为网页加载 JavaScript、css 等这些文件是需要时间的
当然如果你就是要改(爷不听,爷就是要魔改,天王老子来都没用~)
其他改动,以后需要再看参考资料
赞赏按钮 JavaScript 打开主题文件夹 fluid,定位到路径 /source/jsreward-button.js,然后粘贴下面的代码。
1
2
3
4
5
6
7
8
9
10
11
12
13
14
15
16
17
18
19
20
21
22
23
24
25
26
27
28
29
30
31
32
33
34
35
36
37
38
39
40
41
42
43
44
45
46
47
48
49
50
51
52
53
54
55
56
57
58
59
60
61
62
63
64
65
function RewardButton (config ) {this .btnIcon = config.btnIcon ;this .btnText = config.btnText ;this .comment = config.comment ;this .qrcodes = config.qrcodes ;RewardButton .prototype init : function (let btnId = "reward-btn" ;let qrcodesId = "reward-qrcodes" ;var btn = document .createElement ("a" );className = "btn" ;id = btnId;if (this .btnIcon ) {className = `${this .btnIcon} ${btn.className} ` ;innerHTML = " " + this .btnText ;else {innerHTML = this .btnText ;var qrcodes = document .createElement ("div" );id = qrcodesId;var div = document .createElement ("div" );className = "markdown-body" ;style .textAlign = "center" appendChild (btn);innerHTML += `<br><span class="image-caption">${this .comment} </span>` ;appendChild (qrcodes);var postNav = document .querySelector ('.post-prevnext' );parentNode .insertBefore (div, postNav);document .getElementById (btnId).onclick = (function (var container = document .getElementById (qrcodesId);if (container.childNodes .length == 0 ) {for (var i = 0 ; i < this .qrcodes .length ; i++) {var qrcode = document .createElement ("p" );className = "reward-qrcode" ;var img = document .createElement ("img" );src = this .qrcodes [i].src ;title = this .qrcodes [i].title ;alt = this .qrcodes [i].title ;var caption = document .createElement ("p" );className = "image-caption" ;innerText = this .qrcodes [i].caption ;appendChild (img);appendChild (caption);appendChild (qrcode);else if (container.style .display == "none" ) {style .removeProperty ("display" );else {style .display = "none" ;bind (this );
Css 打开主题文件夹 fluid,定位到路径 /source/cssreward-button.css,粘贴以下代码
1
2
3
4
5
6
7
8
9
10
11
12
13
14
15
16
17
18
19
20
21
22
23
24
25
26
27
28
29
30
31
32
33
34
35
36
37
38
39
40
41
42
43
44
45
46
47
48
49
50
51
52
53
54
55
56
57
58
59
60
61
62
63
64
65
66
67
68
69
70
71
72
73
74
75
76
77
78
79
80
81
82
83
84
85
86
87
88
89
90
91
92
93
94
95
96
97
98
99
100
101
#reward-btn {border-radius : 20px ;margin-bottom : 0.625rem ;.reward-qrcode {display : inline-block;margin : 1.5rem !important ;width : 10rem ;height : 10rem ;animation : show_qrcodes .3s .1s ease both;animation : show_qrcodes .3s .1s ease both;animation : show_qrcodes .3s .1s ease both;animation : show_qrcodes .3s .1s ease both;animation : show_qrcodes .3s .1s ease both;.reward-qrcode img {margin-top : 0 !important ;@-moz-keyframes show_qrcodes {0% {opacity : 0 ;transform : translateY (-10px );transform : translateY (-10px );transform : translateY (-10px );transform : translateY (-10px );transform : translateY (-10px );100% {opacity : 1 ;transform : translateY (0 );transform : translateY (0 );transform : translateY (0 );transform : translateY (0 );transform : translateY (0 );@-webkit-keyframes show_qrcodes {0% {opacity : 0 ;transform : translateY (-10px );transform : translateY (-10px );transform : translateY (-10px );transform : translateY (-10px );transform : translateY (-10px );100% {opacity : 1 ;transform : translateY (0 );transform : translateY (0 );transform : translateY (0 );transform : translateY (0 );transform : translateY (0 );@-o-keyframes show_qrcodes {0% {opacity : 0 ;transform : translateY (-10px );transform : translateY (-10px );transform : translateY (-10px );transform : translateY (-10px );transform : translateY (-10px );100% {opacity : 1 ;transform : translateY (0 );transform : translateY (0 );transform : translateY (0 );transform : translateY (0 );transform : translateY (0 );@keyframes show_qrcodes {0% {opacity : 0 ;transform : translateY (-10px );transform : translateY (-10px );transform : translateY (-10px );transform : translateY (-10px );transform : translateY (-10px );100% {opacity : 1 ;transform : translateY (0 );transform : translateY (0 );transform : translateY (0 );transform : translateY (0 );transform : translateY (0 );
注入器 编写注入器,将赞赏功能添加到页面中去
在 Hexo 站点的根目录文件夹下新建一个文件夹 scriptsscript 文件夹下新建一个 reward-button-injector.js,粘贴以下代码
1 2 3 4 5 6 7 8 9 10 11 12 13 14 15 16 17 18 19 20 21 22 23 24 25 26 27 hexo.extend .injector .register ('body_end' , function (const {config .reward_button ;if (!enable) {return null ;return ` <link defer rel="stylesheet" href="/css/reward-button.css"/> <script src="/js/reward-button.js"></script> <script> new RewardButton({ btnIcon: ${btn_icon ? `"${btn_icon} "` : "null" } , btnText: "${btn_text} ", comment: "${comment} ", qrcodes: ${JSON .stringify(qrcodes)} }).init(); </script> ` "post" );
配置 打开全局配置文件 _config.yml,注意:不是 _config.fluid.yml
1
2
3
4
5
6
7
8
9
reward_button: enable: true btn_icon: iconfont icon-love btn_text: 赞赏 comment: 我很可爱,请给我钱! qrcodes: - src: /images/wechatpay.jpg caption: 微信 title: 微信赞赏码
如果需要添加微信和支付宝,就写成如下形式
1
2
3
4
5
6
7
8
9
10
11
12
reward_button: enable: true btn_icon: iconfont icon-love btn_text: 赞赏 comment: 我很可爱,请给我钱! qrcodes: - src: /images/wechatpay.jpg caption: 微信 title: 微信赞赏码 - src: /images/zhifubaopay.jpg caption: 支付宝 title: 支付宝收款码
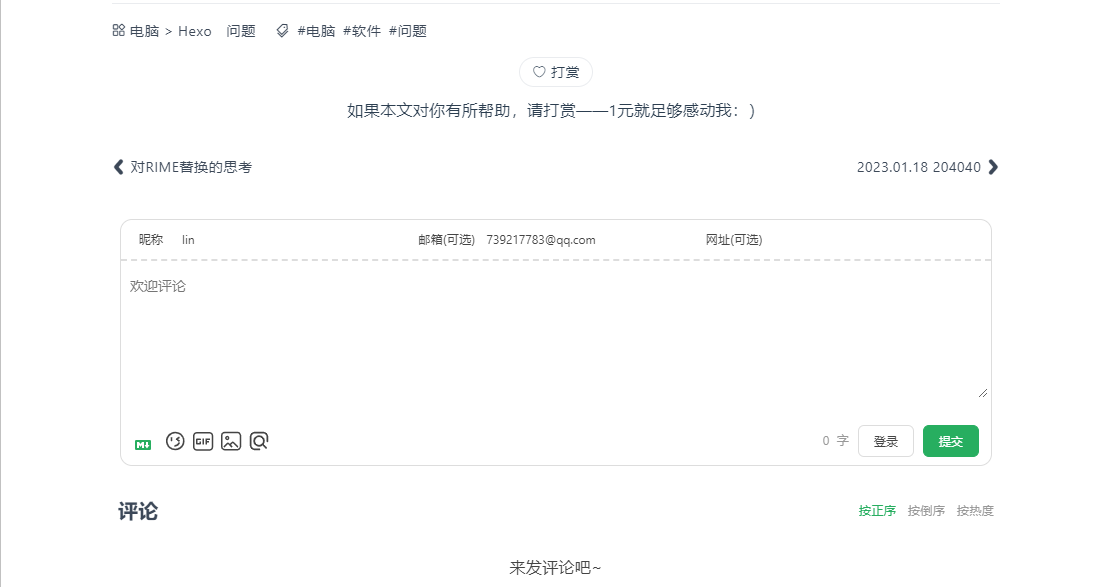
效果图
文章美化 主要行内代码 和加粗 这两个进行修改
打开主题文件夹 fluid,定位到路径 source\cssfluid-extension.css,粘贴以下代码
1 2 3 4 5 6 7 8 9 10 11 12 13 14 15 16 17 18 19 code {background-color : #dddddde6 ;padding : 0 0px 0 0px ;border-radius : 5px ;text-indent : 0 ;color : #e17523 ;strong {color : #be0000 ;font-weight : bold;.navbar-brand strong {color : #fff ;
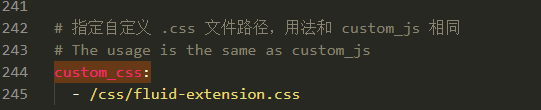
打开 fluid 的配置文件_config.fluid.ymlfluid 主题文件夹下的 _config.ymlcustom_css:,进行修改
1 2 3 4 custom_css: - /css/fluid-extension.css
hexo 三件套走起 hexo clean & hexo g &hexo s
底部添加运行时间
2023 年 4 月 19 日增加方法二
推荐两种方法,根据个人需要进行选择
方法一:
优点:允许单独控制显示
缺点:需要修改主题源代码,对主题侵入式修改,后续如果要还原,没有记录可能不知道如何还原
方法二:
优点:简单方便,模块化的方式,不用修改主题的代码
缺点:由于与页角一起所以不允许控制单独显示与否
方法一 业务逻辑 先创建个 JavaScript 文件,其中是实现业务功能的代码
打开 fluid 主题文件夹,定位路径到 layout\_partialsrunning_time.ejs 文件,粘贴以下代码
注:此处修改你的建站时间或者网站上线时间 注释本站已勉强运行,可以改动那句,改成自己想要的
1
2
3
4
5
6
7
8
9
10
11
12
13
14
15
16
17
18
19
20
21
22
23
24
25
26
27
28
29
30
31
32
33
34
<br />if (theme.running_time && theme.running_time .enable && theme.running_time .create_time ){ %><span id ="timeDate" > 载入天数...</span > <span id ="times" > 载入时分秒...</span > <script > var now = new Date (); function createtime ( var grt = new Date ('<%- theme.running_time.create_time %>' ); now.setTime (now.getTime () + 250 ); days = (now - grt) / 1000 / 60 / 60 / 24 ; dnum = Math .floor (days); hours = (now - grt) / 1000 / 60 / 60 - (24 * dnum); hnum = Math .floor (hours); if (String (hnum).length == 1 ) { hnum = "0" + hnum; } minutes = (now - grt) / 1000 / 60 - (24 * 60 * dnum) - (60 * hnum); mnum = Math .floor (minutes); if (String (mnum).length == 1 ) { mnum = "0" + mnum; } seconds = (now - grt) / 1000 - (24 * 60 * 60 * dnum) - (60 * 60 * hnum) - (60 * mnum); snum = Math .round (seconds); if (String (snum).length == 1 ) { snum = "0" + snum; } document .getElementById ("timeDate" ).innerHTML = " 本站已勉强运行 " + dnum + " 天 " ; document .getElementById ("times" ).innerHTML = hnum + " 小时 " + mnum + " 分 " + snum + " 秒" ; } setInterval ("createtime()" , 250 ); </script >
添加到页脚 需要将上面的业务功能添加到页面的底部fluid 主题文件夹,定位路径 到 layout\_partials\footer.ejs 文件
添加代码(判断是否启用,启动的话引入JavaScript)
1
2
3
<% if(theme.running_time.enable) { %>
完整代码(也可以直接复制这个,覆盖原先的)
1 2 3 4 5 6 7 8 9 10 11 12 13 14 15 16 17 18 19 20 21 22 23 <div class ="footer-inner" > <div class ="footer-content" > </div > <span id ="cnzz_stat_icon_<%= theme.web_analytics.cnzz %>" style ="display: none" > </span > </div >
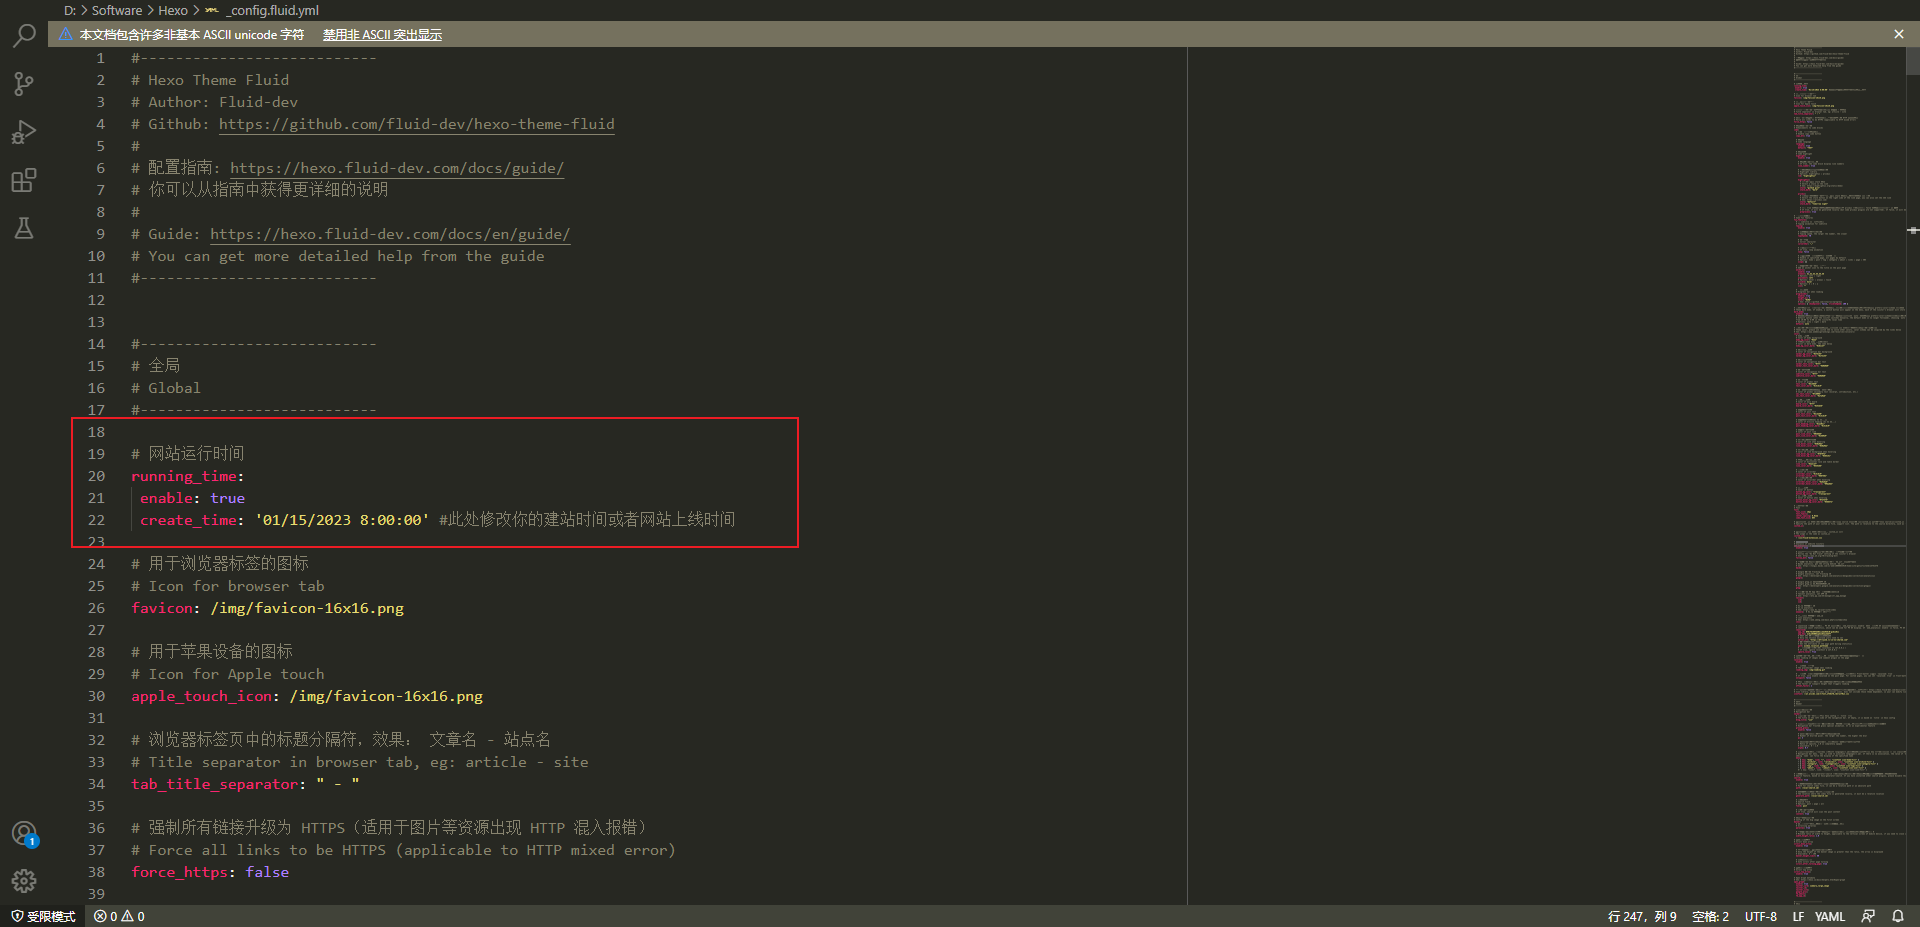
配置 打开主题配置文件 _config.fluid.yml
1 2 3 4 running_time :enable : truecreate_time : '01 /15 /2023 8 :00 :00 ' #此处修改你的建站时间或者网站上线时间
enable :是否启用create_time :建站的时间
配置后,hexo 三件套走起 hexo clean & hexo g &hexo s
方法二 先打开主题配置文件 _config.fluid.yml,添加以下代码
1
2
3
4
5
<div style="font-size: 0.85rem" ><span id ="timeDate" > 载入天数...</span > <span id ="times" > 载入时分秒...</span > <script src ="/js/duration.js" > </script >
修改后
1
2
3
4
5
6
7
8
9
10
11
footer :content : ' <a href="https://hexo.io" target="_blank" rel="nofollow noopener"><span>Hexo</span></a> <i class="iconfont icon-love"></i> <a href="https://github.com/fluid-dev/hexo-theme-fluid" target="_blank" rel="nofollow noopener"><span>Fluid</span></a> <div style="font-size: 0.85rem"> <span id="timeDate">载入天数...</span> <span id="times">载入时分秒...</span> <script src="/js/duration.js"></script> </div> '
在博客目录下创建 source/js/duration.js,代码如下:
1 2 3 4 5 6 7 8 9 10 11 12 13 14 15 16 17 18 19 20 21 22 23 24 25 26 27 28 29 30 31 !(function (var start = new Date ("2020/01/01 00:00:00" );function update (var now = new Date ();setTime (now.getTime ()+250 );1000 / 60 / 60 / 24 ;Math .floor (days);1000 / 60 / 60 - (24 * dnum);Math .floor (hours);if (String (hnum).length === 1 ){"0" + hnum;1000 /60 - (24 * 60 * dnum) - (60 * hnum);Math .floor (minutes);if (String (mnum).length === 1 ){"0" + mnum;1000 - (24 * 60 * 60 * dnum) - (60 * 60 * hnum) - (60 * mnum);Math .round (seconds);if (String (snum).length === 1 ){"0" + snum;document .getElementById ("timeDate" ).innerHTML = "本站安全运行 " +dnum+" 天" ;document .getElementById ("times" ).innerHTML = hnum + " 小时 " + mnum + " 分 " + snum + " 秒" ;update ();setInterval (update, 1000 );